The scent of searing butter and caramelizing onions is a high-stakes siren song that signals the arrival of the ultimate comfort vessel. We are talking about the Polish Pierogi; a masterclass in hydraulic tension and carbohydrate engineering. This is not just a dumpling. It is a structural marvel designed to encapsulate savory fillings within a silky, elastic membrane that must withstand the violent turbulence of boiling water before achieving a golden, Maillard-driven crust in the skillet. When you bite into a perfectly executed pierogi, you are experiencing the intersection of peasant tradition and precise molecular physics. The dough must be supple enough to stretch without tearing, yet resilient enough to snap back against the tooth. Whether they are stuffed with whipped potatoes and tangy curd cheese or a piquant mixture of sauerkraut and forest mushrooms, the objective remains the same. You are the architect of this edible infrastructure. It is time to audit your technique, calibrate your ratios, and transform simple flour and water into a legendary culinary asset.
THE DATA MATRIX
| Metric | Specification |
|---|---|
| Prep Time | 60 Minutes |
| Execution Time | 30 Minutes |
| Yield | 40 to 50 Pierogi |
| Complexity | 6 / 10 |
| Estimated Cost per Serving | $1.25 USD |
THE GATHERS
Ingredient Protocol:
The Structural Membrane (Dough):
- 500g / 3.5 cups All-Purpose Flour (plus extra for the bench)
- 250ml / 1 cup Very Warm Water (approx. 50C / 122F)
- 1 Large Egg (Room Temperature)
- 30g / 2 tbsp Unsalted Butter (Melted)
- 5g / 1 tsp Fine Sea Salt
The Core Payload (Potato and Cheese Filling):
- 1kg / 2.2 lbs Starchy Potatoes (Russet or Yukon Gold)
- 250g / 9 oz Twarog or Farmer's Cheese (Dry Curd)
- 2 Large Yellow Onions (Finely Minced)
- 60g / 4 tbsp Unsalted Butter (for sautéing)
- 10g / 2 tsp Kosher Salt
- 5g / 1 tsp Freshly Cracked Black Pepper
Section A: Ingredient Quality Audit:
The primary failure point in pierogi construction is moisture mismanagement. If your flour has a low protein content, the gluten network will be too weak to support the filling; always opt for a flour with at least 10 to 11 percent protein. If your potatoes are too waxy, the filling will turn viscous and gummy rather than fluffy. To fix a "wet" filling, do not add flour; instead, fold in a small amount of dehydrated potato flakes to absorb excess moisture without altering the flavor profile. If your Farmer's Cheese is overly watery, wrap it in cheesecloth and press it under a heavy weight for thirty minutes to ensure the filling remains stable during the sealing process.
THE MASTERCLASS
Step 1: Hydrating the Gluten Network
Sift your flour onto a clean work surface or into a large mixing bowl. Create a well in the center and pour in the warm water, melted butter, salt, and the lightly beaten egg. Use a fork to gradually incorporate the flour from the edges into the liquid center. Once a shaggy mass forms, switch to your hands.
Pro Tip: Using warm water (50C) accelerates the hydration of starch granules and softens the gluten, making the dough significantly easier to roll out without it snapping back. Use a digital scale for the flour to avoid the volumetric inaccuracies of measuring cups.
Step 2: Developing Elasticity
Knead the dough vigorously for 8 to 10 minutes until it is smooth, elastic, and no longer tacky. When you press a finger into the dough, it should slowly spring back. Wrap the dough tightly in plastic wrap and let it rest at room temperature for at least 30 minutes.
Pro Tip: This resting phase is non-negotiable. It allows the gluten strands to relax, which prevents the dough from shrinking during the cutting phase. A bench scraper is the professional tool of choice here to keep your workspace clean and manage the dough mass efficiently.
Step 3: Engineering the Filling
While the dough rests, boil the peeled potatoes in salted water until tender. Drain and pass them through a ricer while still hot to ensure a lump-free texture. Sauté the minced onions in butter until they are deeply caramelized and render their natural sugars. Fold the onions and the crumbled cheese into the potatoes. Season aggressively with salt and pepper.
Pro Tip: Infuse the butter with the onions slowly over medium-low heat to achieve a uniform golden hue. A heavy-bottomed saucier or skillet provides the even heat distribution necessary for perfect caramelization without scorching.
Step 4: The Assembly Protocol
Roll out a portion of the dough on a lightly floured surface to a thickness of approximately 2mm. Use a circular cutter (3 inches / 7.5cm) to stamp out rounds. Place a tablespoon of cooled filling in the center of each round. Fold the dough over and pinch the edges firmly to create a hermetic seal.
Pro Tip: Avoid overfilling the parcels. If filling touches the edge of the dough, the fat will prevent a proper seal, causing the pierogi to explode during the boil. Use your bench scraper to lift the cut rounds cleanly from the table.
Step 5: The Thermal Transition
Bring a large pot of salted water to a gentle boil. Drop the pierogi in batches. Once they float to the surface, let them cook for an additional 2 to 3 minutes. Remove them with a slotted spoon and transfer them to a tray lightly coated in melted butter to prevent sticking.
Pro Tip: A violent boil will rupture the delicate skins. Maintain a "shiver" in the water rather than a rolling boil to preserve the structural integrity of the dough membrane.
Step 6: The Maillard Finish
Heat a skillet with a generous knob of butter. Place the boiled pierogi in the pan and sear until both sides are crisp and golden brown. Serve immediately with a dollop of cold sour cream and extra caramelized onions.
Pro Tip: To maximize flavor, deglaze the pan with a tiny splash of water or stock if the milk solids in the butter begin to brown too quickly. This creates a light glaze that coats the pierogi.
Section B: Prep & Timing Fault-Lines:
The most common timing error is rolling out all the dough at once. Exposed dough dries out rapidly, creating a "skin" that will crack when folded. Work in small batches and keep the remaining dough covered. If your filling is still warm when you attempt to seal the pierogi, the steam will soften the dough from the inside out, leading to structural collapse. Always ensure the filling is at room temperature or chilled before assembly. If the pierogi sit too long on a tray before boiling, they may stick; use parchment paper dusted with semolina flour to provide a non-stick barrier.
THE VISUAL SPECTRUM
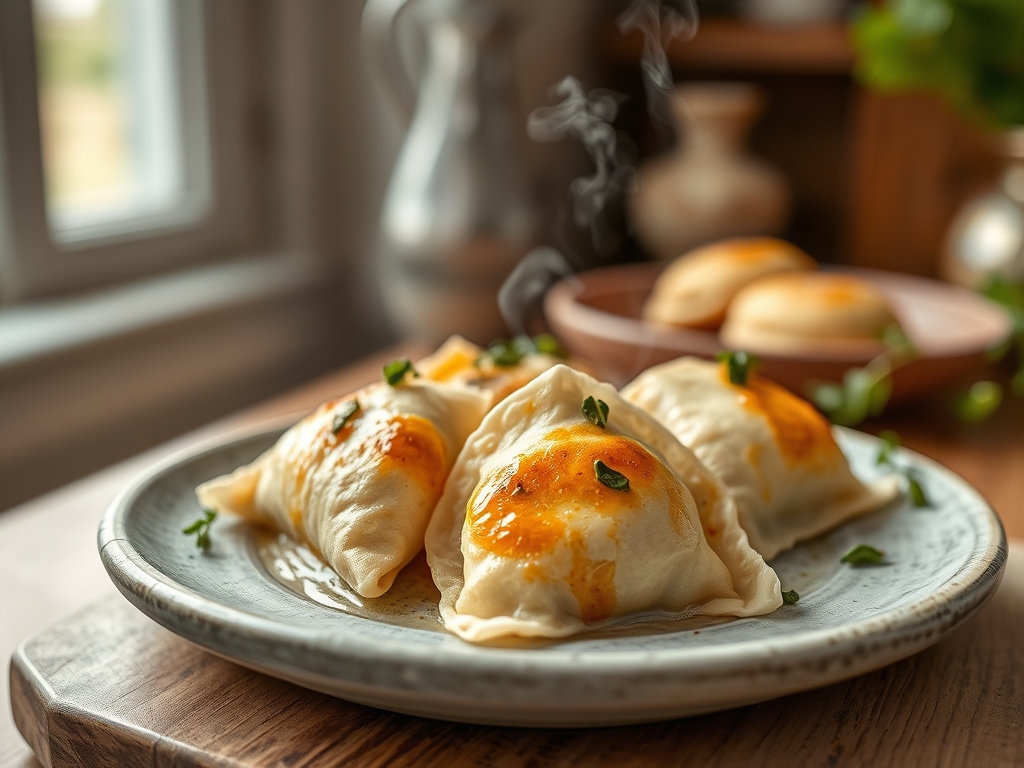
Section C: Thermal & Visual Troubleshooting:
Referencing the Masterclass photo, the ideal pierogi displays a variegated golden-brown surface with distinct "blisters" from the pan-sear. If your pierogi look pale and translucent, they were likely over-boiled and under-seared. If the edges appear thick and white, the dough was rolled too thick; it should be thin enough to almost see the shadow of the filling. Uneven browning usually indicates a crowded pan; ensure each pierogi has direct contact with the hot surface of the skillet. A dull, matte finish suggests a lack of fat; ensure the skillet has enough butter to aerate the surface of the dough as it fries, creating that signature crisp texture.
THE DEEP DIVE
Macro Nutrition Profile:
A standard serving of three Potato and Cheese pierogi contains approximately 320 calories, 45g of carbohydrates, 10g of protein, and 12g of fat. While high in carbohydrates, they provide significant satiety.
Dietary Swaps:
- Vegan: Substitute the egg in the dough with 15ml of vegetable oil and extra water. Use vegan butter and a mixture of mashed potatoes and firm tofu seasoned with lemon juice and nutritional yeast for the filling.
- Gluten-Free: Use a high-quality 1-to-1 gluten-free flour blend containing xanthan gum. Increase the egg count to two to provide the protein structure that gluten normally offers.
- Keto: This is difficult given the potato base; however, "fathead" dough (mozzarella and almond flour) can be used to wrap a filling of cauliflower mash and cheese.
Meal Prep & Reheating Science:
Pierogi are excellent for meal prep. After boiling, toss them in oil and freeze them in a single layer on a baking sheet before transferring to a bag. To reheat, go straight from the freezer into a skillet with butter and a lid. The steam will thaw the center while the butter crisps the exterior, maintaining the molecular structure of the dough without it becoming rubbery.
THE KITCHEN TABLE
Why do my pierogi fall apart in the water?
This is usually caused by a weak seal or trapped air. Ensure the edges are free of flour or fat before pinching. Press out as much air as possible before the final seal to prevent internal pressure from bursting the dough.
Can I use a pasta machine to roll the dough?
Absolutely. A pasta machine ensures a uniform thickness that is difficult to achieve with a rolling pin. Aim for the second or third thinnest setting to ensure the dough is sturdy enough to hold the heavy filling without tearing.
What is the best cheese for the filling?
Traditionalists use Twarog, a dry Polish curd cheese. If unavailable, Farmer's cheese or a very well-drained Ricotta mixed with a bit of feta for tang will suffice. Avoid creamy cheeses that melt into a liquid state when heated.
How do I get the dough extra soft?
The addition of sour cream or Greek yogurt to the dough (replacing some water) adds fat and acidity. This further tenderizes the gluten, resulting in a pillowy, tender texture that remains soft even after the pierogi have cooled.