Imagine a scent that bridges the gap between the sharp clarity of a sourdough starter and the comforting, golden warmth of sun-ripened corn. This is the aromatic signature of African Ogi. It is not merely a breakfast staple; it is a marvel of biological engineering. When you approach a bowl of perfectly executed Ogi, you are witnessing a delicate balance of lactic acid fermentation and starch gelatinization. The surface should be smooth as glass, shimmering with a slight translucency that hints at its viscous texture. As the steam rises, it carries a piquant tang that awakens the palate before the first spoonful even lands. This is a dish of high-stakes chemistry where the humble maize kernel undergoes a structural metamorphosis. We are moving beyond the realm of simple porridge into the territory of refined cereal infrastructure. If you have ever struggled with lumps, watery separation, or a lackluster flavor profile, consider this your formal audit. We are here to optimize your starch slurry and maximize your microbial yield.
THE DATA MATRIX
| Metric | Specification |
|---|---|
| Prep Time | 72 to 96 Hours (Fermentation Phase) |
| Execution Time | 15 Minutes (Thermal Phase) |
| Yield | 4 Standard Servings |
| Complexity (1-10) | 6 (Requires precise moisture control) |
| Estimated Cost per Serving | $0.45 USD |
THE GATHERS
Ingredient Protocol:
- 500g / 2.5 cups Whole Yellow or White Maize (Dried)
- 1.5L / 6.3 cups Filtered Water (For soaking and blending)
- 500ml / 2.1 cups Boiling Water (For final gelatinization)
- Optional: 2g / 0.5 tsp Sea Salt (To infuse mineral depth)
- Optional: 30ml / 2 tbsp Evaporated Milk or Coconut Milk (To render a creamy finish)
Section A: Ingredient Quality Audit:
The primary failure point in African Ogi production is the use of "dead" grain. If your maize has been heat-treated or overly processed, the natural lactobacilli required for fermentation will be absent. Ensure you are sourcing raw, non-GMO dried maize. If your soak water smells putrid rather than pleasantly tart, you have likely fallen victim to wild yeast contamination. The fix? Always use filtered water to avoid chlorine interference with the microbial colony. If the grain remains stubborn after 48 hours, increase the ambient temperature of your fermentation vessel to 75 degrees Fahrenheit to accelerate enzymatic activity.
THE MASTERCLASS
1. The Hydration and Fermentation Phase
Begin by rinsing your maize under cold pressure to remove surface impurities. Place the grain in a deep ceramic or glass vessel and submerge it in filtered water. Cover the vessel with a breathable cloth to allow gas exchange while preventing debris entry. Let this sit in a dark corner for 3 to 4 days. You are waiting for the "sour" note to develop.
Pro Tip: Use a digital scale to track the weight of the grain. As the maize absorbs water, it will increase in mass by approximately 30 percent. This hydration level is critical for the subsequent milling phase to ensure a smooth viscous slurry.
2. The High-Shear Milling Process
Drain the fermentation water (or reserve a small amount to infuse more flavor into the next batch). Transfer the softened kernels to a high-speed blender. Add just enough fresh water to cover the blades and process on the highest setting until the mixture is an ultra-fine liquid.
Pro Tip: Professional chefs use a high-decibel blender to ensure the pericarp (the outer skin) is pulverized. If your blender lacks horsepower, you must pass the liquid through a fine-mesh nut milk bag or a chinois to remove any gritty cellulose.
3. The Sedimentation and Decanting
Pour the blended mixture through a fine sieve into a large bowl. Discard the chaff. Let the liquid sit undisturbed for 3 hours. The heavy starch will settle at the bottom, forming a dense, cake-like layer, while the "sour water" rises to the top.
Pro Tip: Use a bench scraper to clean the sides of your bowl during the settling phase. This prevents dried starch "scales" from falling back into your smooth Ogi base later.
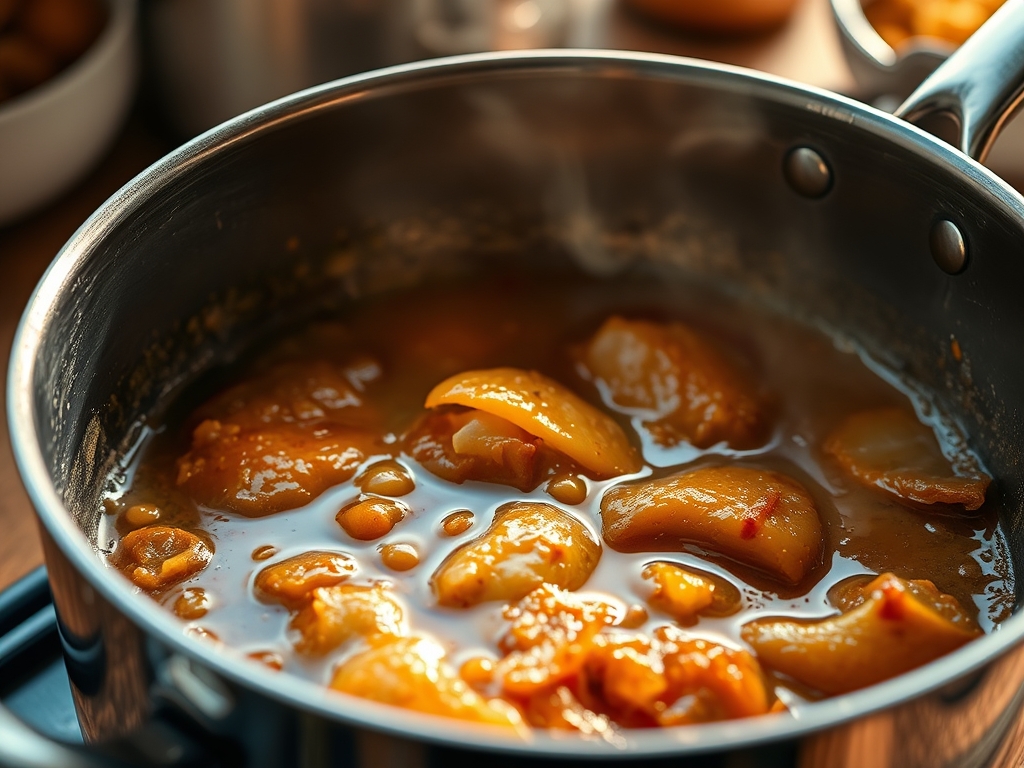
4. The Thermal Gelatinization
This is the "make or break" moment. Take a portion of the settled starch paste and place it in a stainless steel saucier. Slowly add a small amount of room temperature water to create a thin, lump-free slurry. While whisking constantly, pour in boiling water in a steady stream.
Pro Tip: The saucier is the ideal tool here because its curved sides prevent starch from scorching in the corners. You are looking for the exact moment the proteins aerate and the starch granules swell, turning the opaque white liquid into a semi-translucent, thick custard.
Section B: Prep & Timing Fault-Lines:
Timing is the invisible ingredient. If you pour the boiling water too slowly, the temperature of the slurry will drop below the 160 degree Fahrenheit threshold required for starch gelatinization, resulting in a watery mess. If you pour too fast without vigorous whisking, you will create "islands" of cooked starch surrounded by raw liquid. If this happens, immediately transfer the pot to a low flame and whisk aggressively to homogenize the texture.
THE VISUAL SPECTRUM
Section C: Thermal & Visual Troubleshooting:
Referencing the Masterclass photo, your African Ogi should possess a "structural wobble." It should hold its shape when poured but yield instantly to a spoon. If your Ogi looks dull or grey, your fermentation was likely too short; the acidity provides that bright, ivory sheen. If the surface shows cracks, the moisture evaporated too quickly during the cooling phase. To fix a "broken" or lumpy appearance, use an immersion blender to re-emulsify the porridge while it is still hot. The visual goal is a mirror-like finish with zero visible granules.
THE DEEP DIVE
Macro Nutrition Profile
African Ogi is a carbohydrate-dense powerhouse, providing sustained energy release through its complex starch structure. A standard serving contains approximately 220 calories, 4g of protein, and is rich in B-vitamins (Thiamine and Niacin) which are made more bioavailable through the fermentation process. The probiotic nature of the raw slurry is lost during boiling, but the post-biotic metabolites remain beneficial for gut health.
Dietary Swaps
- Vegan: Naturally plant-based. Enhance with cashew cream for added lipids.
- Keto: Traditional Ogi is high-carb. For a low-carb "mock" version, use cauliflower flour fermented with a splash of apple cider vinegar, though the molecular structure will differ.
- Gluten-Free: Maize is naturally gluten-free, making this an elite option for Celiac-safe infrastructure.
Meal Prep & Reheating Science
To store, cover the surface of the Ogi with a thin layer of cold water to prevent a "skin" from forming. When reheating, do not use a microwave as it creates "hot spots" that ruin the starch bonds. Instead, place the Ogi in a small pot with a splash of water or milk and whisk over low heat to re-gelatinize the structure.
THE KITCHEN TABLE
How long can I store the raw Ogi paste?
You can store the fermented paste in the refrigerator for up to 10 days. Ensure it is submerged in a small amount of water to maintain hydration and prevent oxidation of the starch molecules.
Why is my Ogi not thickening?
This usually occurs because the water added was not at a true rolling boil. If the temperature is too low, the starch granules cannot swell. Return the mixture to a stovetop and stir until it reaches the proper thickness.
Can I use cornstarch instead of whole maize?
Technically yes, but you will lose the complex flavor profile and nutritional benefits of fermentation. Cornstarch creates a "flat" taste, whereas fermented maize offers a sophisticated, tangy depth that defines the authentic dish.
What is the best way to sweeten Ogi?
To maintain the molecular integrity, add sweeteners like honey or agave after the thickening process is complete. Adding sugar too early can interfere with the starch's ability to absorb water, potentially thinning the final result.