Listen to the sound of the spoon hitting the bottom of the bowl. It is not a splash; it is a thud. We are moving beyond the watery, translucent compromises of commercial yogurt and entering the realm of Icelandic Skyr. This is the heavyweight champion of the dairy world. It is a substance so thick it defies gravity and so packed with protein it functions more like a soft cheese than a snack. To achieve this level of density, we are not just cooking; we are performing a high-stakes extraction. We are stripping away the lactose-heavy whey to leave behind a concentrated matrix of casein and whey proteins. The texture should be velvet. The flavor should be a sharp, piquant wake-up call to the palate. If your current dairy routine feels thin and uninspired, you are failing the audit. We are here to re-engineer your breakfast into a high-density fuel source that would sustain a Viking through a North Atlantic gale. Prepare for a technical overhaul of your refrigerator.
THE DATA MATRIX
| Metric | Specification |
|---|---|
| Prep Time | 20 Minutes |
| Execution Time | 18 to 24 Hours |
| Yield | 950g / 4 Cups |
| Complexity (1-10) | 6 |
| Estimated Cost per Serving | $1.15 |
THE GATHERS
Ingredient Protocol:
- 3.8 Liters / 1 Gallon Skim Milk (Ultra-pasteurized is prohibited)
- 120ml / 0.5 Cup Live Culture Icelandic Skyr (The "Mother" culture)
- 2 Drops / 2 Drops Liquid Vegetable Rennet
- 30ml / 2 Tablespoons Filtered Water (For rennet dilution)
- 5g / 1 Teaspoon Sea Salt (Optional, for flavor stabilization)
Section A: Ingredient Quality Audit:
The primary failure point in high-density dairy is the milk source. If you use ultra-pasteurized milk, the proteins have been denatured to the point where they cannot form a stable curd. You will end up with a gritty, weeping mess. Technical Fix: Source "High-Temperature Short-Time" (HTST) pasteurized milk or raw milk if your local regulations allow. If the milk smells "cooked" before you start, the Maillard reaction has already compromised the protein structure. Secondly, ensure your starter culture is fresh. If the bacteria are dormant or dead, the pH will not drop fast enough to prevent spoilage. Always check the "Sell By" date on your starter. If it is within three days of expiring, the microbial activity is too low for a successful inoculation.
THE MASTERCLASS
1. Thermal Inoculation and Scalding
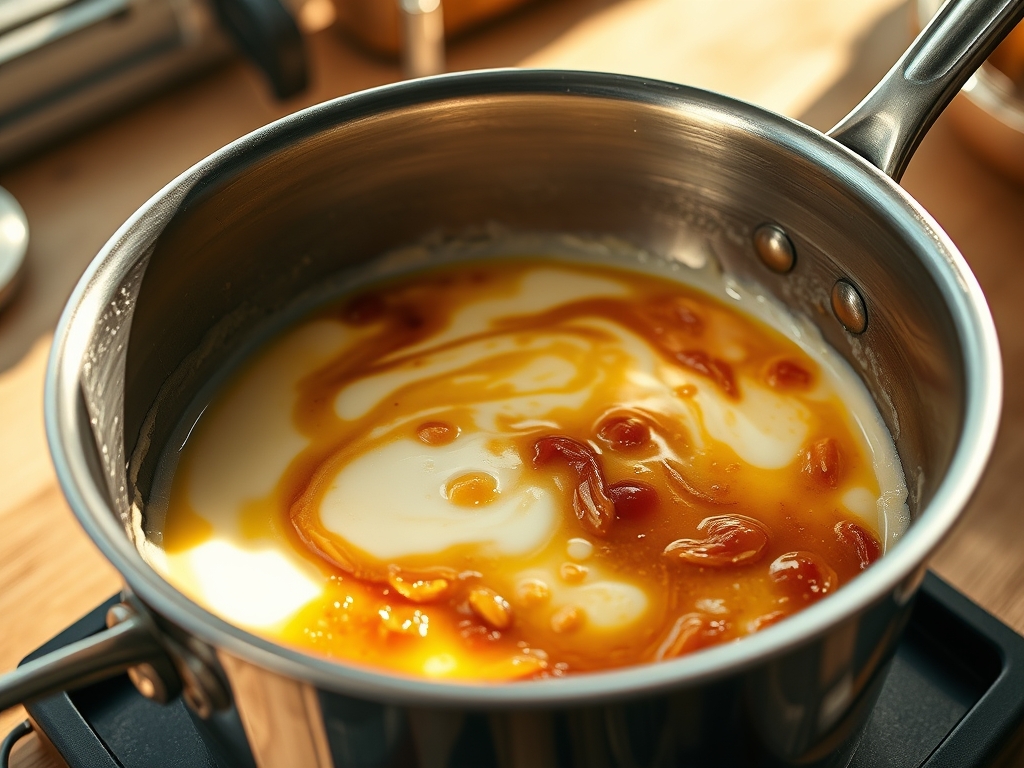
Pour your milk into a heavy-bottomed saucier or stainless steel pot. Slowly bring the temperature up to 88 degrees Celsius (190 degrees Fahrenheit). You are not looking for a rolling boil; you are looking to denature the lactoglobulin. This allows the proteins to bind together more effectively during the fermentation phase. Use a digital thermometer to monitor this precisely. Once reached, hold the temperature for five minutes.
Pro Tip: The science here involves unfolding the whey proteins so they can attach to the casein micelles. This creates a more robust structural mesh, which is essential for that signature viscous mouthfeel.
2. Rapid Cooling and Culture Integration
Place the pot in an ice bath to rapidly drop the temperature to 43 degrees Celsius (110 degrees Fahrenheit). In a small bowl, whisk your starter Skyr with a small amount of the warm milk until smooth. This prevents "clumping" in the final product. Once the main pot is at the target temperature, whisk in the diluted culture and the diluted rennet.
Pro Tip: Speed is vital. If the milk sits too long in the "danger zone" between 50 and 60 degrees Celsius, undesirable thermophilic bacteria can take hold, creating "off" flavors that are piquant in all the wrong ways. Use a silicone whisk to ensure total integration without scratching your vessel.
3. The Incubation Phase
Cover the pot tightly and wrap it in heavy towels or place it in an oven with the pilot light on. You need to maintain a steady 40 to 43 degrees Celsius for 12 hours. During this time, the bacteria consume the lactose and produce lactic acid, which drops the pH and causes the proteins to coagulate into a solid mass.
Pro Tip: Do not disturb the vessel. Agitation during the set phase breaks the delicate protein strands, leading to a grainy texture. Professional labs use stabilized incubators; your goal is to mimic that stillness to ensure a clean "break" when the curd is cut.
4. The High-Density Strain
After 12 hours, the milk should have the consistency of a soft custard. Line a large colander with high-thread-count cheesecloth or a specialized nut milk bag. Carefully ladle the curd into the cloth. Suspend this over a deep bowl and allow it to drain in the refrigerator for at least 6 to 10 hours.
Pro Tip: This is where the magic happens. By removing the liquid whey, you are concentrating the solids. Use a bench scraper to gently move the curd away from the edges of the cloth every few hours to facilitate even drainage. The longer you strain, the more "thick" and "cheese-like" the result becomes.
Section B: Prep & Timing Fault-Lines:
The most common human error is impatience during the cooling phase. If you add your live cultures when the milk is above 46 degrees Celsius, you will scald the bacteria to death. The result is a pot of warm milk that never sets. Conversely, if the incubation temperature drops below 38 degrees Celsius, the fermentation slows to a crawl, allowing competing yeasts to enter the fray and produce a "fizzy" or sour-bread smell. Use a dedicated fermentation wrap or a sous-vide water bath for the most consistent results.
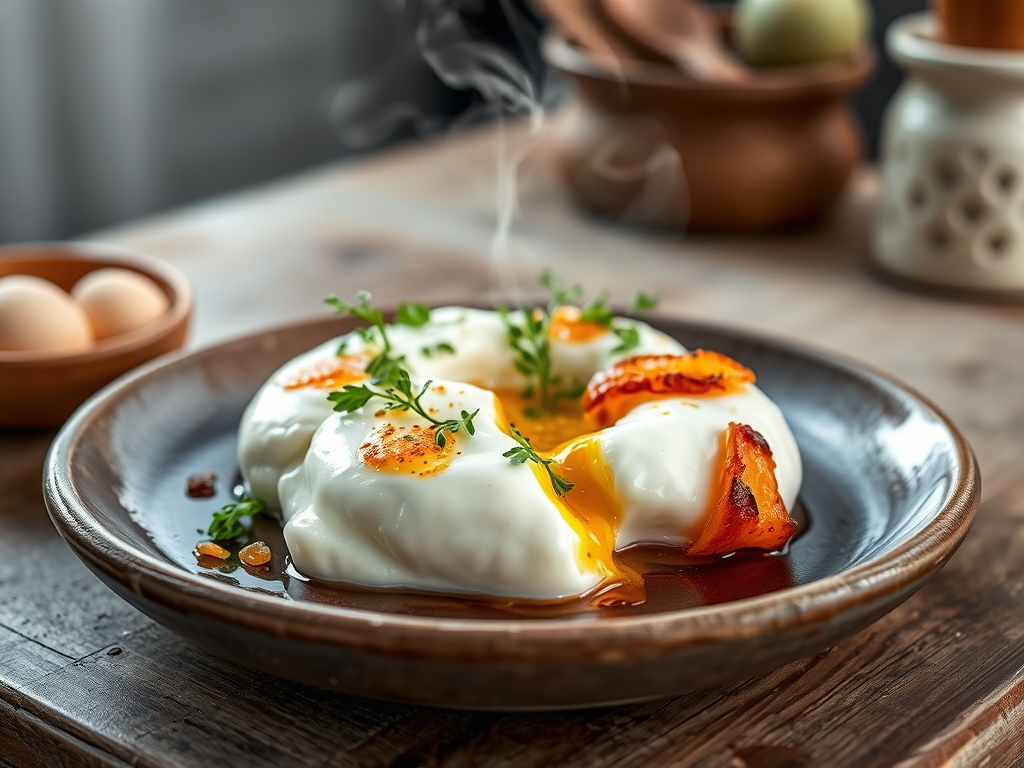
THE VISUAL SPECTRUM
Section C: Thermal & Visual Troubleshooting:
Referencing the Masterclass photo, your Skyr should possess a brilliant, matte-white finish. If you see yellowing on the surface, your incubation temperature was too high, causing slight oxidation. If the texture looks "cracked" or "pitted," you likely over-agitated the curd during the transfer to the straining cloth. A dull, greyish hue indicates your milk was not fresh or had a high somatic cell count. To fix a grainy texture, you can aerate the finished product by passing it through a fine-mesh sieve or giving it a quick pulse in a high-speed blender. This will break down any oversized protein clumps and restore the velvet sheen.
THE DEEP DIVE
Macro Nutrition Profile:
A standard 150g serving of this technical Skyr contains approximately 17g of protein, 6g of carbohydrates, and 0g of fat (if using skim milk). It is an incredibly efficient delivery system for branched-chain amino acids.
Dietary Swaps:
- Vegan: This process is specifically for dairy proteins. For a plant-based alternative, use fatty coconut milk and a vegan-specific probiotic starter, though you must add a thickener like agar-agar as plant proteins do not "curd" with rennet.
- Keto: Swap the skim milk for a 50/50 mix of whole milk and heavy cream. This will infuse the Skyr with healthy fats while keeping the carb count low.
- GF: Naturally gluten-free.
Meal Prep & Reheating Science:
Skyr should never be "reheated" in a traditional sense; heat above 50 degrees Celsius will cause the proteins to tighten and expel moisture, turning your creamy masterpiece into rubber. For meal prep, store in airtight glass containers. It will stay stable for up to 10 days. If the Skyr separates slightly over time, do not discard the liquid; simply stir it back in to re-emulsify the solids.
THE KITCHEN TABLE
Why is my Skyr bitter?
Bitterness usually stems from using too much rennet. Rennet is a powerful enzyme; even an extra drop can over-proteolyze the milk, releasing bitter peptides. Precision is key. Use a digital scale or a calibrated dropper for the rennet.
Can I use Greek yogurt as a starter?
Technically yes, but you will not produce Skyr. Skyr requires specific strains like Bacterial cultures (S. thermophilus, L. bulgaricus) plus the addition of rennet. Without the rennet and the specific Icelandic strains, you are just making thick yogurt.
Why is the texture gritty instead of smooth?
This is often caused by heating the milk too quickly or not whisking the starter culture thoroughly. If the "Mother" isn't fully integrated, it creates localized pockets of high acidity, which causes uneven protein clumping.
What do I do with the leftover whey?
Do not toss it. This liquid is gold. Use it to deglaze pans for a piquant pan sauce, or use it as the liquid base for sourdough bread. It contains residual proteins and minerals that are highly nutritious.